
Deploy Galleries on your Shopify Store
Overview
Social Commerce provides an easy way to connect your Shopify store with Social Commerce’s shoppable content galleries and carousels on standard storefront pages: Homepage, PDP, Category page, and a custom Gallery page.
This guide will walk you through copying snippets to your theme liquid files in your Shopify storefront management console.
If you want more information on setting up Galleries in the Social Commerce App, visit this guide.
Install Site Script
In order to integrate Social Commerce so that your experiences and analytics work across your Shopify store, you’ll need to add the Social Commerce site script to your theme. This will not change the look or feel of your website, but will allow you to implement and track your gallery. To create the script tag, replace YOUR_SITENAME in the HTML snippet below with your Social Commerce site name, which can be found in the Social Commerce app by clicking on Embed Gallery in the upper right corner of your Galleries Dashboard.
<script>
!(function (siteName) {
  var e = window.crl8 = window.crl8 || {}, n = !1, i = [];
  e.ready = function (e) { n ? e() : i.push(e) },
  e.pixel = e.pixel || function () { e.pixel.q.push(arguments) },
  e.pixel.q = e.pixel.q || [];
  var t = window.document, o = t.createElement("script"),
  c = e.debug || -1 !== t.location.search.indexOf("crl8-debug=true") ? "js" : "min.js";
  o.async = !0,
  o.src = t.location.protocol + "//edge.curalate.com/sites/" + siteName + "/site/latest/site." + c,
  o.onload = function () { n = !0, i.forEach(function (e) { e() }) };
  var r = t.getElementsByTagName("script")[0];
  r.parentNode.insertBefore(o, r.nextSibling)
})('YOUR_SITENAME');
</script>
For example, if your site is named Habiliment-RUQGBj, then your site script tag would be:
<script>
!(function (siteName) {
  var e = window.crl8 = window.crl8 || {}, n = !1, i = [];
  e.ready = function (e) { n ? e() : i.push(e) },
  e.pixel = e.pixel || function () { e.pixel.q.push(arguments) },
  e.pixel.q = e.pixel.q || [];
  var t = window.document, o = t.createElement("script"),
  c = e.debug || -1 !== t.location.search.indexOf("crl8-debug=true") ? "js" : "min.js";
  o.async = !0,
  o.src = t.location.protocol + "//edge.curalate.com/sites/" + siteName + "/site/latest/site." + c,
  o.onload = function () { n = !0, i.forEach(function (e) { e() }) };
  var r = t.getElementsByTagName("script")[0];
  r.parentNode.insertBefore(o, r.nextSibling)
})('Habiliment-RUQGBj');
</script>
Now you need to add this HTML to your theme.
-
Click Online Store in the left navigation bar of your Shopify Admin Panel. Then click Themes.
-
On the Themes page, find your current theme and click Actions. Then click Edit Code.
-
In the editor that appears, find the theme.liquid* file in the Layout section. Click on it. Scroll to the closing
</head>tag toward the top of the file. -
Paste the HTML tag you generated above the
</head>tag. -
Save your changes by clicking Save.
Here's an example of what this might look like in your editor:
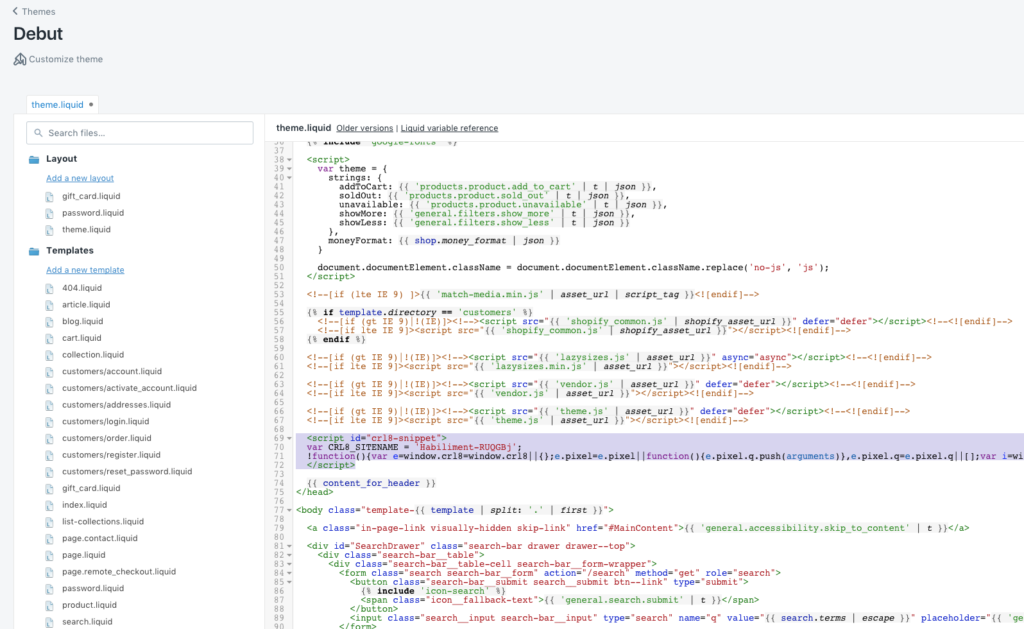
Note: Preview won't show anything at this stage.
*If your theme uses index.json or product.json instead of index.liquid and product.liquid, please follow these steps:
-
Click Online Store.
-
Click Themes, then Customize Theme.
-
Navigate to the page where the Gallery should be displayed (e.g. PDP).
-
Click Add Block.
-
Paste the code into the "Custom Liquid" section.
Install page-specific HTML
For each experience you want to activate (Homepage, Category, PDP, Gallery page), you'll need to specify an HTML <div> tag. These tags should be edited into the page based on where you want the experience to show up. The code you'll need to copy into your site for each of the different experiences is below. Feel free to add any additional HTML elements you want above or below your Gallery, for example, a header.
HOMEPAGE
To add your homepage experience to your store, navigate to the Shopify Theme editor.
-
Click Online Store in the left navigation bar of your Shopify Admin Panel. Then click Themes.
-
On the Themes page, find the theme you want to edit and click Actions. Then click Edit HTML/CSS.
-
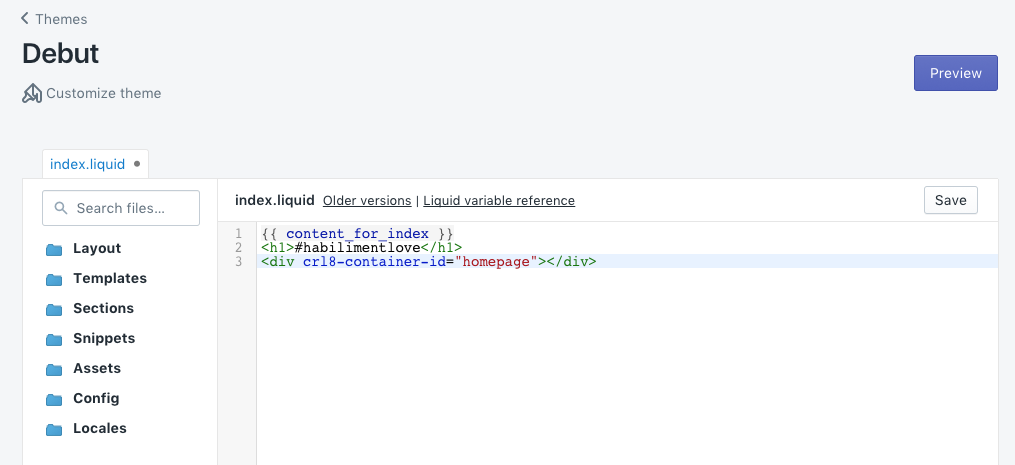
In the editor that appears, find the index.liquid file. Click on it.
-
Paste in the HTML tag from below into the page where you would like your Social Commerce experience to appear.
-
Preview your changes by clicking Preview and then save your changes by clicking Save.
-
Your Gallery is now live on your homepage!
<div crl8-container-id="homepage"></div>Here's an example of what this will look like in your editor, though your exact placement will vary based on your theme and customizations:
Product Detail Page (PDP)
To add a PDP experience to your product detail pages, follow the steps below:
-
Click Online Store in the left navigation bar of your Shopify Admin Panel. Then click Themes.
-
On the Themes page, find the theme you want to edit and click Actions. Then click Edit Code.
-
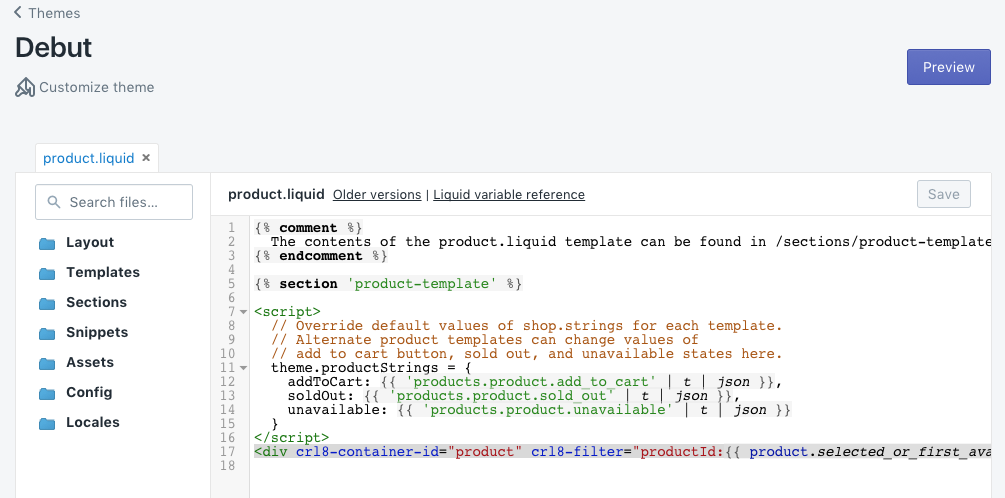
In the editor that appears, find the
product.liquidfile. Click on it. This is the template for your product details page. -
Copy in the HTML tag from below into the page where you would like your Social Commerce experience to appear. We recommend placing it towards the bottom of the page, below the product details.
-
Preview your changes by clicking Preview and then save your changes by clicking Save.
-
Your Gallery is now live on your PDPs! If the product on the PDP is not an exact match with products tagged in User Generated Content (UGC), the Gallery will not appear on that PDP.
<div crl8-container-id="product" crl8-filter="productId:'{{ product.selected_or_first_available_variant.sku }}'"></div>Here's an example of what this will look like in your editor, though your exact placement will vary based on your theme and customizations:
Other Galleries
To add your gallery experience to your store, follow the steps below. Your gallery experience can go on any page in your Shopify store. We recommend creating a separate page titled 'Gallery', adding 'Gallery' to your navigation menu, and placing your gallery experience on your new Gallery page.
- Click Online Store in the left navigation bar of your Shopify Admin Panel. Then click Pages.
- Click Add page. You will be taken to a new webpage editor. Enter 'Gallery' as the Page title.
- In the Content editor, click the 'Show HTML' button on the right-hand side.
- Paste in the HTML tag from below into the page where you would like your Social Commerce experience to appear.
- Preview your changes by clicking Preview and then save your changes by clicking Save.
<div crl8-container-id="YOUR_GALLERY_ID"></div>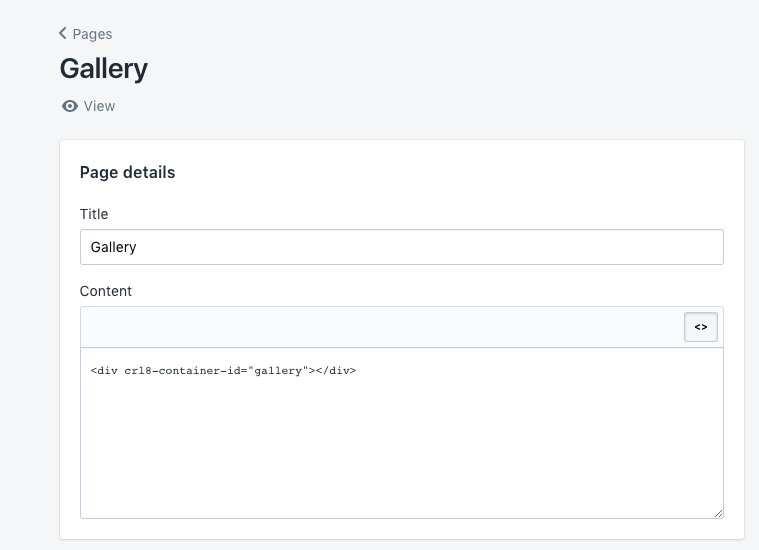
Configure Ecommerce Tracking
Ecommerce Tracking enables site Conversion, AOV, and Revenue based insights for your Gallery within the Social Commerce App. If you connect Google Analytics in the Social Commerce Web App, then you're already set up.
If you don't use Google Analytics, follow the following steps to enable these insights.
Checkout (PURCHASE) Events
Shopify already has a method to allow you to add conversion tracking to your checkout page. This is exactly what is needed for revenue reporting for your Social Commerce experiences to work.
- In your Shopify admin panel, click Settings and then click Checkout.
- In the Order processing section, find the Additional Scripts text box.
- Copy the code below into this box. Note that just like in the Install site script step you need to replace
YOUR_SITENAMEin the HTML below with your Social Commerce site's name.
<script id="crl8-snippet">
!(function (siteName) {
  var e = window.crl8 = window.crl8 || {}, n = !1, i = [];
  e.ready = function (e) { n ? e() : i.push(e) },
  e.pixel = e.pixel || function () { e.pixel.q.push(arguments) },
  e.pixel.q = e.pixel.q || [];
  var t = window.document, o = t.createElement("script"),
  c = e.debug || -1 !== t.location.search.indexOf("crl8-debug=true") ? "js" : "min.js";
  o.async = !0,
  o.src = t.location.protocol + "//edge.curalate.com/sites/" + siteName + "/site/latest/site." + c,
  o.onload = function () { n = !0, i.forEach(function (e) { e() }) };
  var r = t.getElementsByTagName("script")[0];
  r.parentNode.insertBefore(o, r.nextSibling)
})(YOUR_SITENAME);

crl8.pixel('addTransactionInfo', {
	'transactionId': '{{ checkout.id }}',
	'userId': '{{ checkout.email }}',
	'cartValue': '{{ checkout.total_price | money_without_currency }}',
	'taxValue': '{{ checkout.tax_price | money_without_currency }}',
	'shippingValue': '{{ checkout.shipping_price | money_without_currency }}',
	'shippingCity': '{{ checkout.shipping_address }}',
	'currency': '{{ shop.currency }}'
});
{% for item in checkout.line_items %}
crl8.pixel('addProduct', {
	'productId': '{{ item.product_id }}',
	'productName': '{{ item.title }}',
	'price': '{{ item.price | money_without_currency }}',
	'displayPrice': '{{ item.line_price | money_without_currency }}',
	'quantity': '1',
	'sku': '{{ item.sku }}'
});
{% endfor %}
crl8.pixel('send');
</script>
Updated 3 months ago